Showing posts with label Wyatt Manor. Show all posts

Tuesday, July 14, 2015

From The Ground Up


"For I know the plans I have for you," declares the Lord,
"plans to prosper you and not to harm you,
plans to give you hope and a future." ~ Jeremiah 29:11
 

My absence from the blog has been lengthy because we have been B.U.S.Y.!!!  Hopefully, I can portray just what we've been up to with some before and after photos, showing the progression of our farm build.  In four short years we have accomplished many things and tackled many hurdles. We still have a ways to go and I'm quite certain there will be many more hurdles, but with determination and faith we will persevere!
 
Delight yourself in the Lord and He will give you
the desires of your heart. ~ Psalm 37:4


I've written several posts herehere, and here, chronicling our progress from clearing trees, to building our home.  There are some posts that never happened like clearing pastures and putting in fences.  I'll introduce those phases to you through the photos in this post.  I'm so glad I took so many pictures of each stage. It's amazing to look back and see the huge changes we've made!

Through it all, we give all the glory to God above, and thank Him continually for our many blessings.

For I am the Lord, your God,
who takes hold of your right hand and says to you,
 Do not fear; I will help you. ~ Isaiah 41:13 


the back yard - BEFORE

the back yard - AFTER
 
the back yard - BEFORE 

the back yard - AFTER

the old pasture - BEFORE
 
the old pasture - AFTER
 

the entrance - BEFORE


the entrance - AFTER
 

the new pasture - BEFORE
 

the new pasture - AFTER
 

the new pasture - AFTER
 

the new pasture - BEFORE
 

the new pasture - AFTER
 

the old pasture - BEFORE
 

the old pasture - AFTER


from the front door of the house - BEFORE
 

from the front door of the house - AFTER


from the front door of the house - AFTER
 

from the front door looking toward the new pasture - BEFORE


from the front door looking toward the new pasture - AFTER
 
front of house - BEFORE
 

front of house - AFTER
 

laying sod - BEFORE
 

laying sod - AFTER
 

from the driveway toward the new pasture - BEFORE
 
from the driveway toward the new pasture - AFTER
 
 
We expect there will be many more changes going forward, and I will do my best to share our progress with you here.
 
I am also debating a name change for the blog to go along with our endeavor and our website.  Not to mention, it's likely that travel will be rare once we get our cattle.  So what do you think? Should I change the name of the blog to Rogers Creek Farm? Leave your comments below, please.


Thursday, August 7, 2014

The Dining Room Furniture, Before and After

As a follow up to my previous post, Moving Day, here are before and after photos of our antique Louis XIV china cabinet and dessert buffet that was damaged in the move.

It still amazes me, that after 22 years of military service and moving all over the world, we've never had damage to our household goods like we incurred this time.  "This time" being a move within the same state, less than 100 miles from the point of origin!  I guess there's no such thing as a perfect track record!  And on the bright side, it could have been much worse, as some of our military friends have experienced complete nightmares with their moves.

And to chalk it up to the moving company, Coastal Moving and Storage, they took full responsibility of the damage of our furniture and various items, taking care of all cleaning, repairs, and compensation.  In a timely manner, to boot!  While I probably wouldn't recommend them for handling a job that includes high risk, irreplaceable items, their response and rapid settlement of our claim was impressive.
 
The moving company took care of transporting these pieces to Colonial Woodworks in Columbia, SC.  They were the moving company's choice and we knew nothing about them.  While the job took a good amount of time, we couldn't be more pleased with the work they did and the care they displayed in bringing these special pieces back to life.  I have to admit, after the first month came and went and we still didn't have our furniture, I became extremely skeptical.  Of course my mind was going through all the "what-ifs" and I wasn't thinking very positively.
 
Finally the day for delivery came, and I honestly think I gasped when the pieces were placed in our dining room.  Having not seen the before photos, I wasn't positive of where the work was done, and to my unknowing eyes it was difficult to guess.  Once I was able to store away all our linens, china, crystal and serving pieces, I had the moving company send the "before" photos to me.   
 
As you can see in the photos below the work is impeccable!  Sincere gratitude go out to Steve and Laurie at Colonial Woodworks.  We HIGHLY recommend them for all your furniture refinishing needs!

We love our dining room and look forward to many many years of enjoyment, sharing meals and good times with dear family and precious friends.  Come visit us!!!


The Dessert Buffet
Before and After


The China Cabinet
Before and After

Monday, April 14, 2014

The Summer Cover

Among the many decisions Travelin' BRITS and I had to make during the build of our home was what type of tile or design we would incorporate as the back splash in the kitchen, mainly the area over the cooktop, as it would be the focal point in the center of our kitchen.

We knew we wanted a stucco-style vent surround, but the verdict was out on what the feature would be on the wall below.
 
At one of our favorite stores in Columbia, SC, Southeastern Salvage,  we found beautiful tumbled, raw travertine tiles.  And because of the type of store, we bought all they had not knowing, or caring, if it would be enough to cover the back splash areas in our kitchen.  Based out of Chattanooga, TN, Southeastern Salvage is a store that sells overstocks of all sorts of builders' materials, as well as imported furniture items, at prices that are truly unbeatable! 


I'm a firm believer of web surfing, magazine flipping, and HGTV viewing for inspiration and ideas for various projects, whether it be DIY or done by professionals.  It's just helpful to be able to bring the vision in your head to life through pictures.  That said, Travelin' BRITS and I have become avid browsers of the pages of Tuscan Style Magazine.  A bi-annual periodical that truly makes you say ooh and aah with each page turn.  It was in this magazine that I started paying special attention to the back splash in so many of the featured homes' kitchens, magnificent kitchens with unbelievable features and furnishings.  In one particular kitchen I noticed an interesting cook top back splash.  On closer inspection and reading the caption that accompanied the photo, I discovered the home owners had used a gorgeous repurposed summer fireplace cover.


Architectural salvage?  Repurposing something cool from an old house?  Now we're talking!  But what is a summer cover, you ask? 

"A Summer Cover was 1 of the 3 components commonly used on small coal fireplaces. The surround served as a frame for the fireplace opening. There were usually tabs on the lower portion of the surround onto which the coal grate hung inside of the fireplace. The cover door also mounted onto this surround frame, attaching from the outside.

The door was completely removable and was taken off when there was a fire burning. When the fireplace was not in use then the door, or cover, was mounted back onto the frame, keeping warm air from the house from rising up the chimney and in the summer keeping the cooler and often smelly air in the chimney from dropping down into the house.


The cover doors were made from a variety of materials. A fair number were heavy, cast iron doors but  frequently they are made of tin and also some in brass. They were always made of a fireproof metal, as it was common to put the cover on when the coals burnt down low so the family didn't wake up to a completely cold house in the morning, by which time the fire had burned out.

The design of the cover was most often a bit ornate, and matched the design elements found in the frame."


Many covers, as mentioned above are a bit ornate, but many are on the plain side. Many tell a story, while others are designed with something special for the owner.


Ok, enough with the history lesson.  Rewind to a  beautiful sunny October day.  I stopped in my favorite flea market/antique mall in Florence, SC, Thieves Market.  I LOVE that place!  I'm always able to find cool stuff in there, and often get side-tracked from what I'm looking for by all the amazing treasures they have in there.  Even the front porch is loaded with interesting treasures, weather-exposed and all!

After poking around on the front porch and not finding any fireplace covers I headed inside.  Mind you, Thieves Market covers a huge area, packed with both junk and treasure.  So as I passed the front counter the kind proprietor asked if she could help me.  So I asked if they had any summer covers.  "Why, yes, as a matter of fact, there's one booth that has several.  But did you see the one on the front porch?"  What?  No!  Where?  So she led me to it.  It was a rusty mess, but worth keeping in mind while I went to see the others all located further in the expanse of this treasure trove of goodies. 

None of them were what I was looking for, so back to the front porch I went.  Incredible, so fitting, and in a word perfect!  SOLD!  And I even got it for less than the ticketed price... even better!

It was a rusty, gross mess, but I was determined to make it work and to get Travelin' BRITS to love it too.  Which he did.  He even helped with the cleaning.


I had read somewhere that apple cider vinegar and steel wool do wonders together in removing rust.  So that's what I started out with.  While it did remove a large amount of oxidation, I needed to step up my efforts a couple notches, not to mention the old paint and soot that needed to be removed.  In came the heavy duty paint removal Jasco Premium Paint and Epoxy Remover.  That is some powerful stuff!  I poured it on the cover, worked it into all the nooks and crannies and left it for several hours.


When I returned, not much had changed until I started scrubbing with my steel bristle brush.  All that old paint and rust just started disappearing!  It was amazing!  All the details of the design started popping out before my eyes!  I was so excited I could barely contain myself!  I rinsed it off and left it to dry.


I came back to it after about 30 minutes and knew I was looking at our cooktop back splash!   Even though our kitchen fixtures are all bronze finish, I chose to paint the back splash with a Rustoleum copper spray paint.  It turned out beautifully, and blends perfectly with all the other special features of our kitchen. 


Cooking is a necessary hobby that is now a great pleasure realizing I repurposed a unique thing of the past into our 21st century home.


Saturday, April 5, 2014

Stencil Do Over

Time for some updates from my end... 
 
Life has been a whirlwind of activity since we moved into our house.  Amongst all the unpacking was decorating and shopping for Christmas, planning our first Christmas dinner in our new home, and trying to settle in to a routine in our new surroundings.
 
The stair risers didn't survive the foot traffic of painters, carpenters, and other workers, so they were painted over.  It's just as well, because the paint colors I had chosen originally didn't quite go with the colors I had chosen for the walls and trim work in the main entrance.  Not to mention the scuffs and dings to the original job were pretty awful.
 
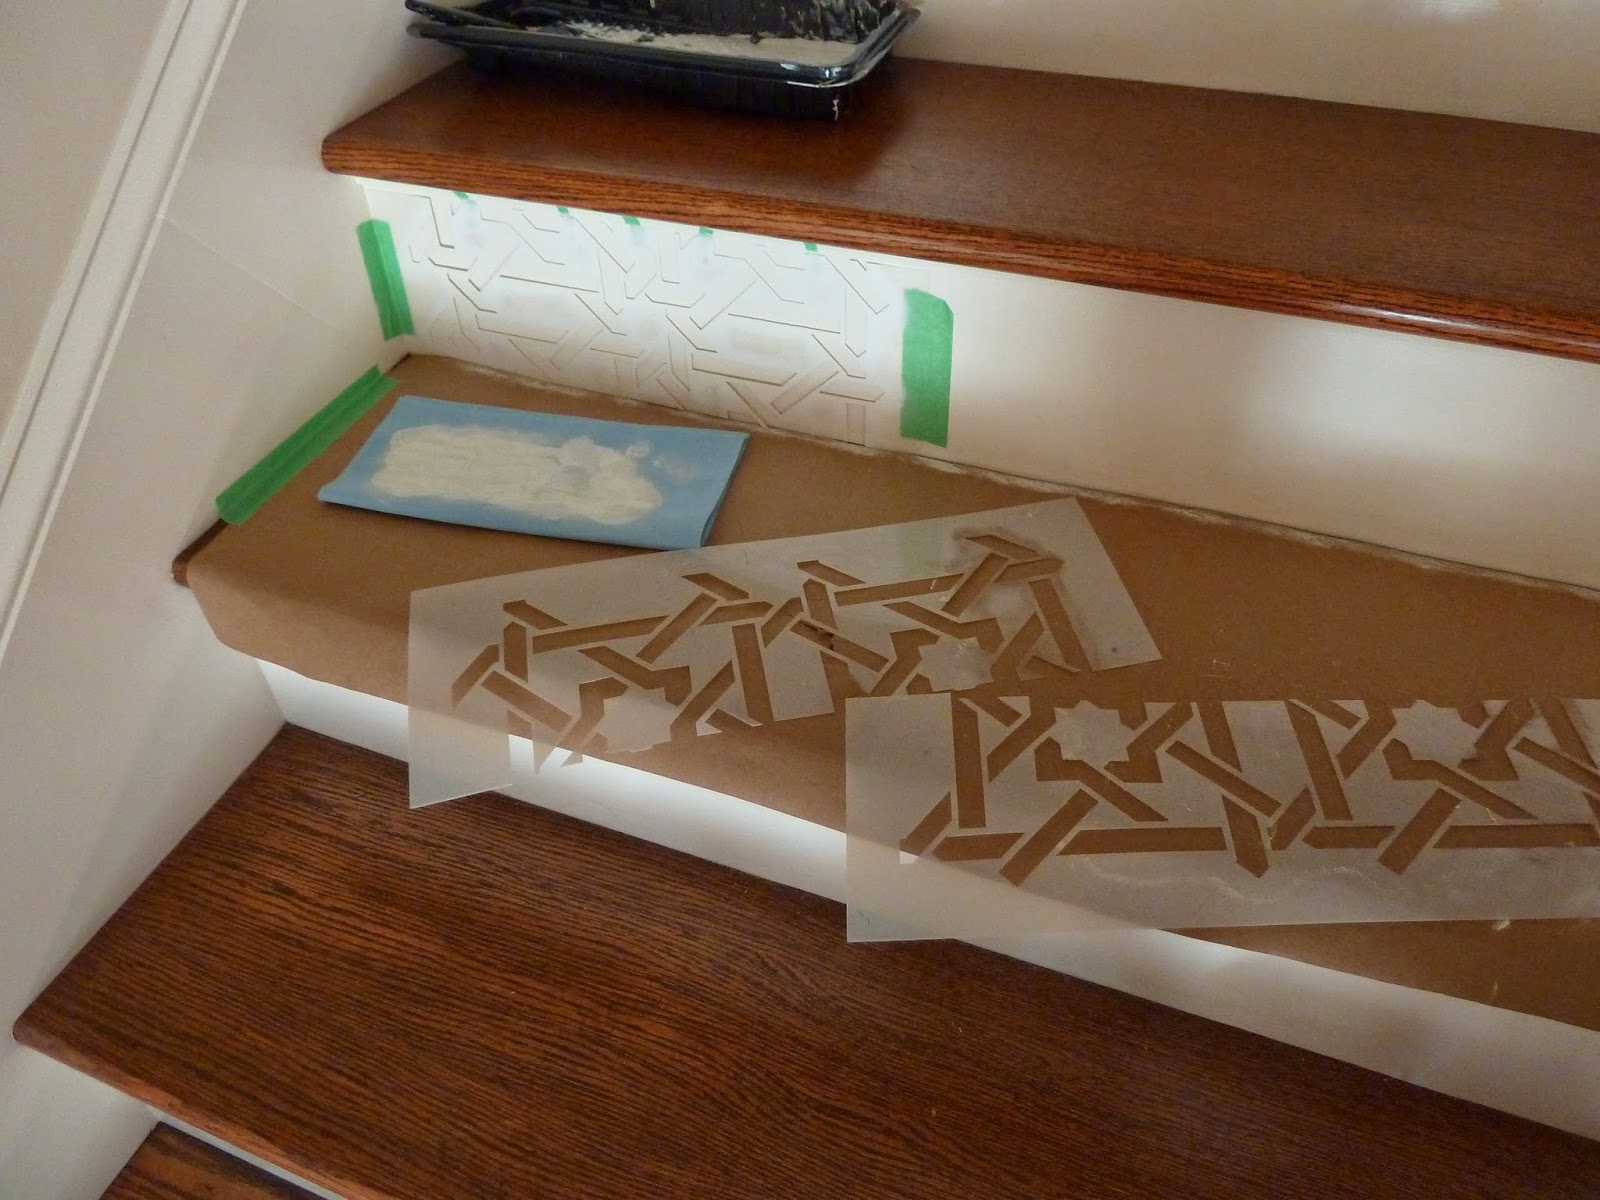
While I wasn't happy about having to do it again, I still felt very strongly about having this unique feature on the staircase.  But it was going to be tricky! With the risers completely connected to the stair treads, I had no choice but to paint them in place.  This meant also having to trim the stencils to the same size of the risers in order for them to lay flat.  I didn't want to do this but truly had no alternative.  Given this dilemma, I really didn't want to compromise all my stencils so I decided to re-stencil using only one design. 
Royal Design Studio's small camel weave, which is my favorite.


During one of the snowstorms, we lost power and I decided to get started.  It was the perfect time, and the glare from the snow outside provided the perfect lighting.


As before, the risers were painted with a satin finish, and I stenciled using the same color,
Sherwin Williams Westhighland White, but in a matte finish.


The final result is tastefully elegant and is stunning without being overwhelming.