Showing posts with label dream home. Show all posts

Monday, February 23, 2015

Is It Ever Going to End?

In the last year, I have tried my best to realize the good in each and every day.  To find something of beauty to marvel at, something that caused me to take notice, be grateful, be humbled.

I've had plenty to keep me busy around the house and farm, and, personally, I think I've done a pretty good job of holding it all together and pushing through both large and small jobs.


But the darkness of loneliness, depression, and despair were never far away.  Even though I never let myself fall into that pit, I admit there have been plenty of days of self pity.

My husband, my very best friend, left for a one year assignment in February 2014.  He should be back by now......  But he's not.  I know I've got to be strong, and I know I've got to be patient, and I know he's coming home, but by golly, I'm tired of waiting!!!

This is just a part of what it means to be married to the military.  The separations, the unknown, the indefinite answers, the Army being in control of our lives.

Winter has been extreme this year for much of the country.  And I've always found this part of winter to be the ugliest.  Everything is so dead and drab it makes you wonder how any of it could still have life in it!  This provides the perfect correlation to my situation:  will it ever end?

Thankfully, the promise of spring is always there, just like it's been in years and centuries past.  I see leaf and flower buds on trees and spring flowers pushing up from the dirt.  It provides comfort and an undeniable invigorating energy.  Even the increase in daylight hours has a positive impact!


So all that being said, what better time for my beloved to come home... during Spring!  A time for renewal, a time for new beginnings, a time for recommitment to each other and the vows we spoke so long ago, renewed enthusiasm and determination as we continue building our farm.


I still don't know the exact day he will return, but I just know it's going to be soon.  It just has to be! 

So I'll close with a picture that pretty much sums it all up: 


Monday, April 14, 2014

The Summer Cover

Among the many decisions Travelin' BRITS and I had to make during the build of our home was what type of tile or design we would incorporate as the back splash in the kitchen, mainly the area over the cooktop, as it would be the focal point in the center of our kitchen.

We knew we wanted a stucco-style vent surround, but the verdict was out on what the feature would be on the wall below.
 
At one of our favorite stores in Columbia, SC, Southeastern Salvage,  we found beautiful tumbled, raw travertine tiles.  And because of the type of store, we bought all they had not knowing, or caring, if it would be enough to cover the back splash areas in our kitchen.  Based out of Chattanooga, TN, Southeastern Salvage is a store that sells overstocks of all sorts of builders' materials, as well as imported furniture items, at prices that are truly unbeatable! 


I'm a firm believer of web surfing, magazine flipping, and HGTV viewing for inspiration and ideas for various projects, whether it be DIY or done by professionals.  It's just helpful to be able to bring the vision in your head to life through pictures.  That said, Travelin' BRITS and I have become avid browsers of the pages of Tuscan Style Magazine.  A bi-annual periodical that truly makes you say ooh and aah with each page turn.  It was in this magazine that I started paying special attention to the back splash in so many of the featured homes' kitchens, magnificent kitchens with unbelievable features and furnishings.  In one particular kitchen I noticed an interesting cook top back splash.  On closer inspection and reading the caption that accompanied the photo, I discovered the home owners had used a gorgeous repurposed summer fireplace cover.


Architectural salvage?  Repurposing something cool from an old house?  Now we're talking!  But what is a summer cover, you ask? 

"A Summer Cover was 1 of the 3 components commonly used on small coal fireplaces. The surround served as a frame for the fireplace opening. There were usually tabs on the lower portion of the surround onto which the coal grate hung inside of the fireplace. The cover door also mounted onto this surround frame, attaching from the outside.

The door was completely removable and was taken off when there was a fire burning. When the fireplace was not in use then the door, or cover, was mounted back onto the frame, keeping warm air from the house from rising up the chimney and in the summer keeping the cooler and often smelly air in the chimney from dropping down into the house.


The cover doors were made from a variety of materials. A fair number were heavy, cast iron doors but  frequently they are made of tin and also some in brass. They were always made of a fireproof metal, as it was common to put the cover on when the coals burnt down low so the family didn't wake up to a completely cold house in the morning, by which time the fire had burned out.

The design of the cover was most often a bit ornate, and matched the design elements found in the frame."


Many covers, as mentioned above are a bit ornate, but many are on the plain side. Many tell a story, while others are designed with something special for the owner.


Ok, enough with the history lesson.  Rewind to a  beautiful sunny October day.  I stopped in my favorite flea market/antique mall in Florence, SC, Thieves Market.  I LOVE that place!  I'm always able to find cool stuff in there, and often get side-tracked from what I'm looking for by all the amazing treasures they have in there.  Even the front porch is loaded with interesting treasures, weather-exposed and all!

After poking around on the front porch and not finding any fireplace covers I headed inside.  Mind you, Thieves Market covers a huge area, packed with both junk and treasure.  So as I passed the front counter the kind proprietor asked if she could help me.  So I asked if they had any summer covers.  "Why, yes, as a matter of fact, there's one booth that has several.  But did you see the one on the front porch?"  What?  No!  Where?  So she led me to it.  It was a rusty mess, but worth keeping in mind while I went to see the others all located further in the expanse of this treasure trove of goodies. 

None of them were what I was looking for, so back to the front porch I went.  Incredible, so fitting, and in a word perfect!  SOLD!  And I even got it for less than the ticketed price... even better!

It was a rusty, gross mess, but I was determined to make it work and to get Travelin' BRITS to love it too.  Which he did.  He even helped with the cleaning.


I had read somewhere that apple cider vinegar and steel wool do wonders together in removing rust.  So that's what I started out with.  While it did remove a large amount of oxidation, I needed to step up my efforts a couple notches, not to mention the old paint and soot that needed to be removed.  In came the heavy duty paint removal Jasco Premium Paint and Epoxy Remover.  That is some powerful stuff!  I poured it on the cover, worked it into all the nooks and crannies and left it for several hours.


When I returned, not much had changed until I started scrubbing with my steel bristle brush.  All that old paint and rust just started disappearing!  It was amazing!  All the details of the design started popping out before my eyes!  I was so excited I could barely contain myself!  I rinsed it off and left it to dry.


I came back to it after about 30 minutes and knew I was looking at our cooktop back splash!   Even though our kitchen fixtures are all bronze finish, I chose to paint the back splash with a Rustoleum copper spray paint.  It turned out beautifully, and blends perfectly with all the other special features of our kitchen. 


Cooking is a necessary hobby that is now a great pleasure realizing I repurposed a unique thing of the past into our 21st century home.


Saturday, April 5, 2014

Stencil Do Over

Time for some updates from my end... 
 
Life has been a whirlwind of activity since we moved into our house.  Amongst all the unpacking was decorating and shopping for Christmas, planning our first Christmas dinner in our new home, and trying to settle in to a routine in our new surroundings.
 
The stair risers didn't survive the foot traffic of painters, carpenters, and other workers, so they were painted over.  It's just as well, because the paint colors I had chosen originally didn't quite go with the colors I had chosen for the walls and trim work in the main entrance.  Not to mention the scuffs and dings to the original job were pretty awful.
 
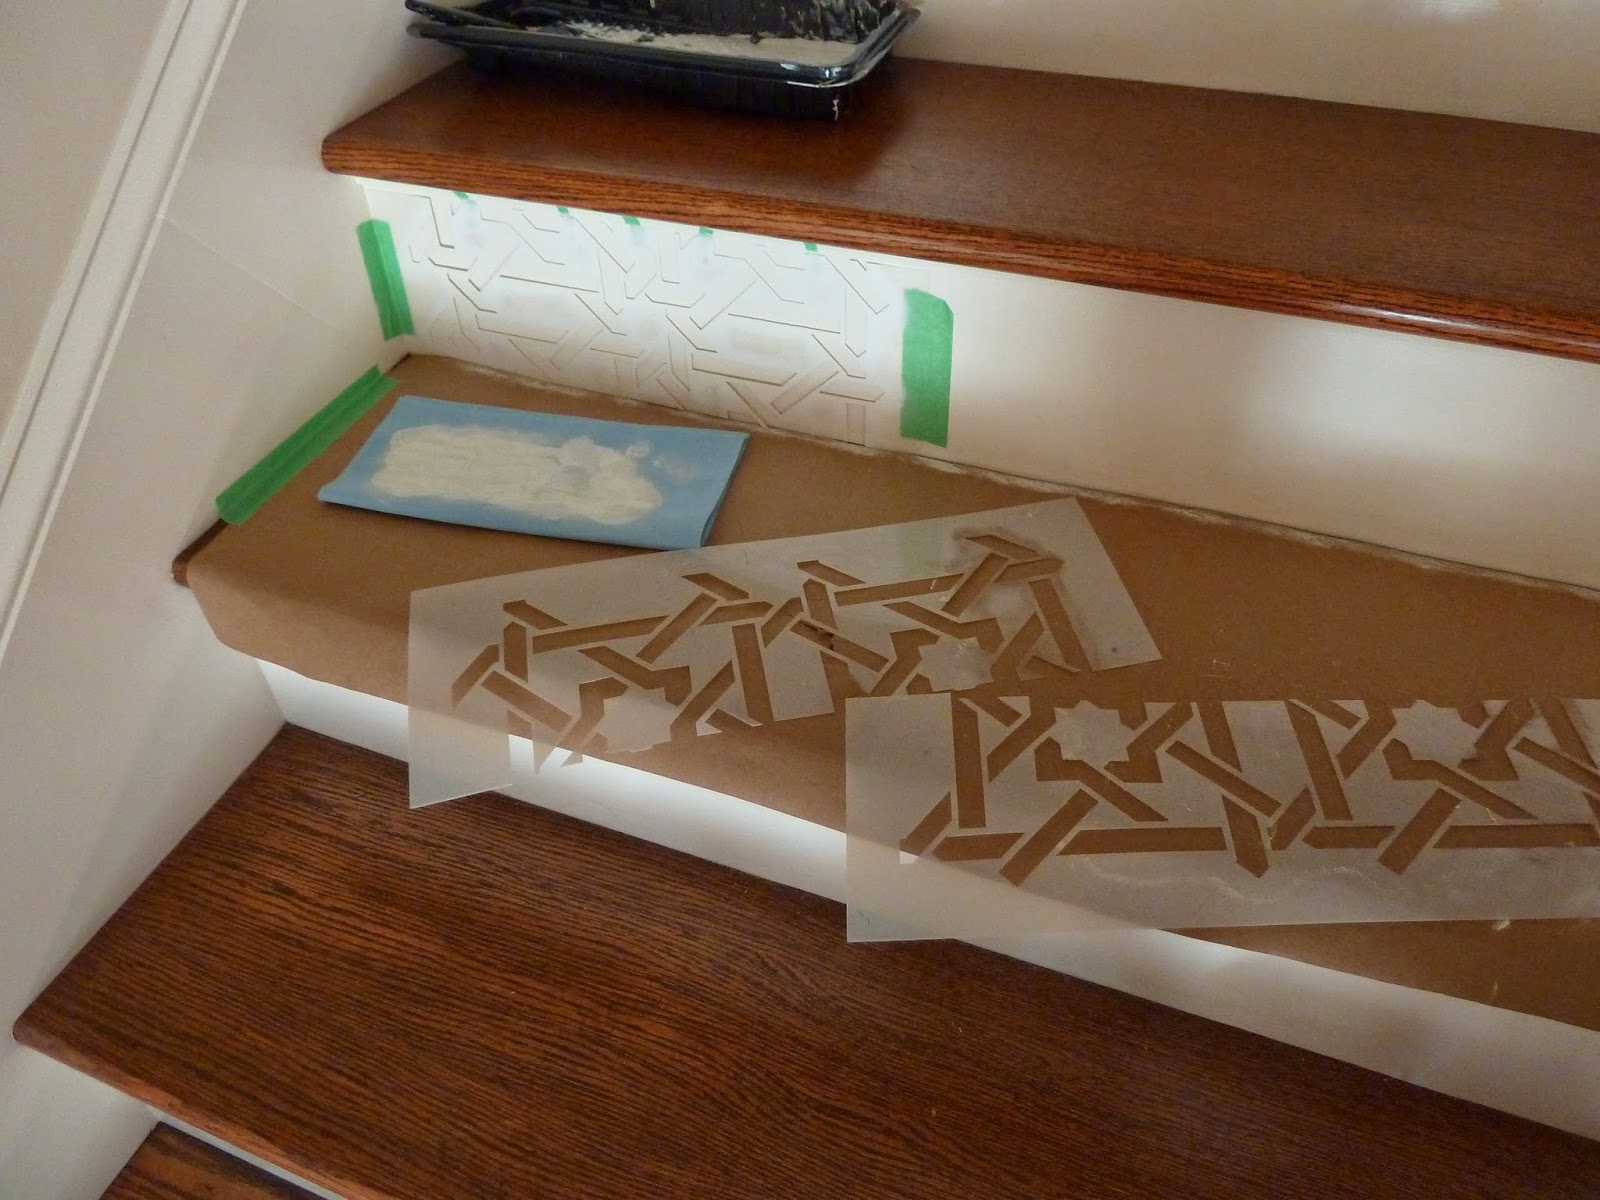
While I wasn't happy about having to do it again, I still felt very strongly about having this unique feature on the staircase.  But it was going to be tricky! With the risers completely connected to the stair treads, I had no choice but to paint them in place.  This meant also having to trim the stencils to the same size of the risers in order for them to lay flat.  I didn't want to do this but truly had no alternative.  Given this dilemma, I really didn't want to compromise all my stencils so I decided to re-stencil using only one design. 
Royal Design Studio's small camel weave, which is my favorite.


During one of the snowstorms, we lost power and I decided to get started.  It was the perfect time, and the glare from the snow outside provided the perfect lighting.


As before, the risers were painted with a satin finish, and I stenciled using the same color,
Sherwin Williams Westhighland White, but in a matte finish.


The final result is tastefully elegant and is stunning without being overwhelming.


Monday, January 13, 2014

Moving Day!

December 2, 2013.  After months of decisions, dreaming, budget busting, and anticipation the day finally arrived for us to move into our beautiful home!  We were so excited the night before we could hardly sleep!

I had every intention of snapping several photos on this monumental day, but never had the opportunity to do so.  For the first time E.V.E.R. TravelinBRITS was left in charge of the movers while I had to travel to the airport 2 hours away to collect our son who had been away at basic training in San Antonio, TX, with the SC Air National Guard.  I had every confidence that my husband could handle the task at hand.... and he did!

When our son and I returned, things seemed under control.  Six moving crates had been unloaded, and the five remaining were almost done.  Almost immediately I noticed the anxious look on my husband's face...... several furniture items had not been off loaded, but we held out hope that they were in the final crate yet to be opened.  Alas, they were not, commencing phone calls to the dispatch office, notifying the office manager we were missing a crate.

Search for the missing crate began immediately, while we began the task of unpacking over 400 boxes!  Our task became rather tedious as certain boxes could not be unpacked due to not having the furniture that would hold the items (mainly our Louis XIV china cabinet and dessert buffet, bookcase, master bedroom dresser and chest of drawers).  Needless to say, anxiety set in like the persistent buzz of a mosquito, annoying and troubling!

Two days after delivery we received a call from the moving and storage company regional manager with good news and bad news.  Good news:  crate was found.  Bad news: contents of the crate had suffered severe water damage due to the items sitting on a leaky truck during the continuous summer storms we endured last July.  Uggghhh!  I had answered the call, but had to hand the phone off to my husband before I went completely ballistic on the guy! 

Water damage, severe mold, and possibly total loss on some of our most high dollar items!  Why is it that the high dollar/irreplaceable items are the things to suffer the most damage whenever we move.  The stuff made of particle board or items we'd just as soon send to the curb are NEVER damaged!  Riddle me that, Batman!

The manager's next question was, "Would you like us to deliver these items and you set up the appraisals and repair contacts?". Are you nuts???  NOOOO!!!  You did this so you are responsible.  You get the appraisals and assessments on the items and go from there, especially since you're in a metro region where the resources are available!  We don't want these items delivered until all damage has been repaired or replaced.

Along with the furniture items mentioned above, ALL my beautiful Moroccan pillows, poufs, and cushions were covered in mold, ALL our Civil War prints (Mort Kunstler, Don Stivers, etc), a Civil War sabre replica, my husband's military dress sabre, and one very special award presented to my husband by His Royal Highness, Mohammed VI, Kingdom of Morocco, suffered water and mold damage.  To date, all repairs and/or restoration is in progress with one item being declared a total loss, but we've not had any visual on the items so not sure if we will be 100% satisfied.  We won't take delivery until all has been completed.

The hardest thing about the whole ordeal is the fact that we have moved 16 times across continents and oceans, and have never experienced damage like this.  These items were in storage for less than 6 months and traveled less than 100 miles from the warehouse to their destination.... and for the FINAL TIME!  Our last move and we suffer losses like never before!!!

I don't have a moral to this story.  All of this could have been avoided if the moving company put a little more effort into caring for our stuff.  Yeah, it's just stuff, but it's a military career's worth of collecting special things from around the world.  Things that can't be replaced.  Things that have extraordinary sentimental value.  Things that were heavily considered when planning and building our new home.

Coastal Moving and Storage Their motto: Moving You Like Family.  What a joke!!!!!!!  They are no family of mine!

Once these items have been delivered and things have been put away, I look forward to sharing photos of our home.  We are extremely happy with all the special features and love being there, calling it HOME!

Thursday, September 19, 2013

Excitement is Building!


Where does the time go!?  I cannot believe all that has happened since I last gave y'all an update on the house.  And not only has a lot changed with the house, but we've also had a few life changing events too.  But more on that in another posting...

In chronological order, here's some photos of the past several weeks:


beams in the family room

matching cabinets in the family room

kitchen cabinets and island

fridge nook and butler's pantry

laundry room

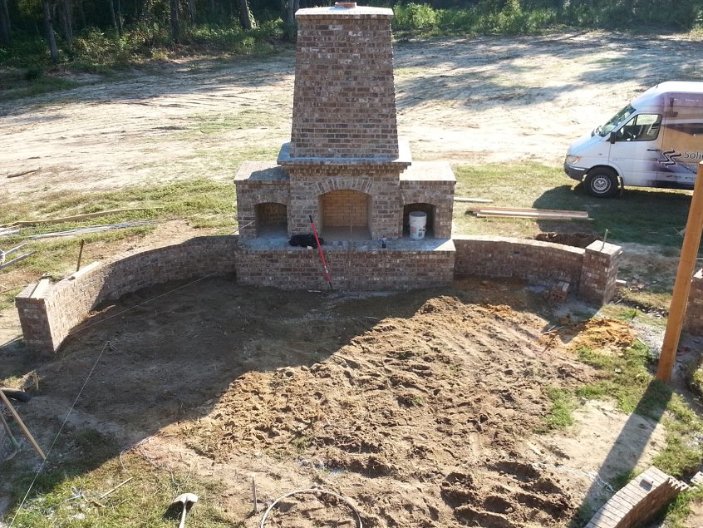
finished outdoor fireplace and prepping for the stamped concrete patio

stone being delivered

one of my favorite "things" in the house; love how the light casts such a beautiful shadow!

hot tub deck and more patio prep work
 
view from above of almost finished patio

another shot of the butler's pantry

another of my favorite things....the laundry room door! mounted on a track like a barn door


For those of you following along with our build, I don't think I'll be posting many more updates here.  If you want periodic snippets you'll have to join my Facebook page.  Just click on the button in the right margin.  I will post random pictures there.  And you can also follow Travelin' GRITS to receive notification of new postings. 

Instead, I will be posting about some other life events, as well as some projects I'll start working on that will find their permanent place at the house.  I'm guessing the next and final few weeks of the build will be full of lots of changes....... and I can't wait!!!  :)

Until then....

Tuesday, September 3, 2013

The Stencil Project, Finished

So after several weeks of working on this project, it is finally complete, and we couldn't be more pleased!  Even TravelinBRITS is happy with how everything turned out!  But because the risers still aren't attached to the stairs, I don't have a photo of the "finished" project.  Hopefully by the end of September the staircase will be complete and everything will be in place.

before
 
A little background history: 
We’ve spent many years living in various places around the world due to my husband’s active duty military assignments.   Our most recent overseas assignment had us in Morocco for 3 years.  We fell in love with Moroccan patterns, design and colors, but most interestingly we started collecting antique hand-carved wooden doors with the intention of incorporating them into our home construction as functional doors, which is super exciting to see them being brought to life again as they are hung in the doorways around the house!  We also collected a wide variety of beautiful Moroccan lanterns that will be hung around our home as functional lighting, but also as accent pieces.
 
Stenciling the stair risers was an idea I had while following the beautiful blog of Maryam Montague, My Marrakesh, and seeing one of the finished projects at Peacock Pavilion in Marrakesh.  The amazing stencil designs and projects were developed by Melanie Royal of Royal Design Studio

My husband and I wanted the final result of our project to be subtle due to all the other patterns greeting guests ranging from the old doors, to the lanterns, to the iron balustrades. So I chose contrasting finishes (matte and semi-gloss) of the same color paint, Valspar Sunset Nude, to achieve the look, and am completely blown away with how much I love it!!!


Because of the heavy influence of Moroccan design throughout our home, I chose three Royal Design Studio stencils from their Moroccan collection (choosing WAS NOT easy!): 


What a great way to give our home a unique, hand-painted look!  I can definitely see more stencil projects in our future for making dramatic statements wherever we choose!

And while this isn't the final look, it makes me giddy with anticipation of what our staircase will really look like when it is complete!


Sunday, August 25, 2013

Coming Along!

Y'all would not believe how long I've waited to post this update!  I've had a myriad of computer issues that have nearly gotten the best of me, but in the end I came out with a brand new Windows Surface replacing my original Surface that I got last Christmas.  It ended up being a faulty piece of equipment.  My dinosaur of a laptop is going in for a tune-up this week.  Shhh, it might be beyond help at the stage it's in.  But I'm willing to give it one last chance!

Anyway, following are some captioned photos of  the house and the progress thus far.  Needless to say, WE ARE SO EXCITED!!!


front of house
back porch ceiling

view of staircase from front door

through the master bedroom pocket doors to the study

looking from the dining room into the kitchen toward the breakfast and family rooms

looking back toward the kitchen from the family room

family room fireplace and ceiling height chimney

view from second story down to family room

view from the wooded driveway

window and door trim begun

window trim

crown molding going up

making sure our Moroccan arched stained glass window fits its opening

columns and coffered ceiling!

arching the doorways!

second story arch

master bath tub surround

living room columns, again

backyard patio

outdoor fireplace began last Thursday

patio fireplace:  this was done in just 2 days!