Showing posts with label stencil project. Show all posts

Saturday, April 5, 2014

Stencil Do Over

Time for some updates from my end... 
 
Life has been a whirlwind of activity since we moved into our house.  Amongst all the unpacking was decorating and shopping for Christmas, planning our first Christmas dinner in our new home, and trying to settle in to a routine in our new surroundings.
 
The stair risers didn't survive the foot traffic of painters, carpenters, and other workers, so they were painted over.  It's just as well, because the paint colors I had chosen originally didn't quite go with the colors I had chosen for the walls and trim work in the main entrance.  Not to mention the scuffs and dings to the original job were pretty awful.
 
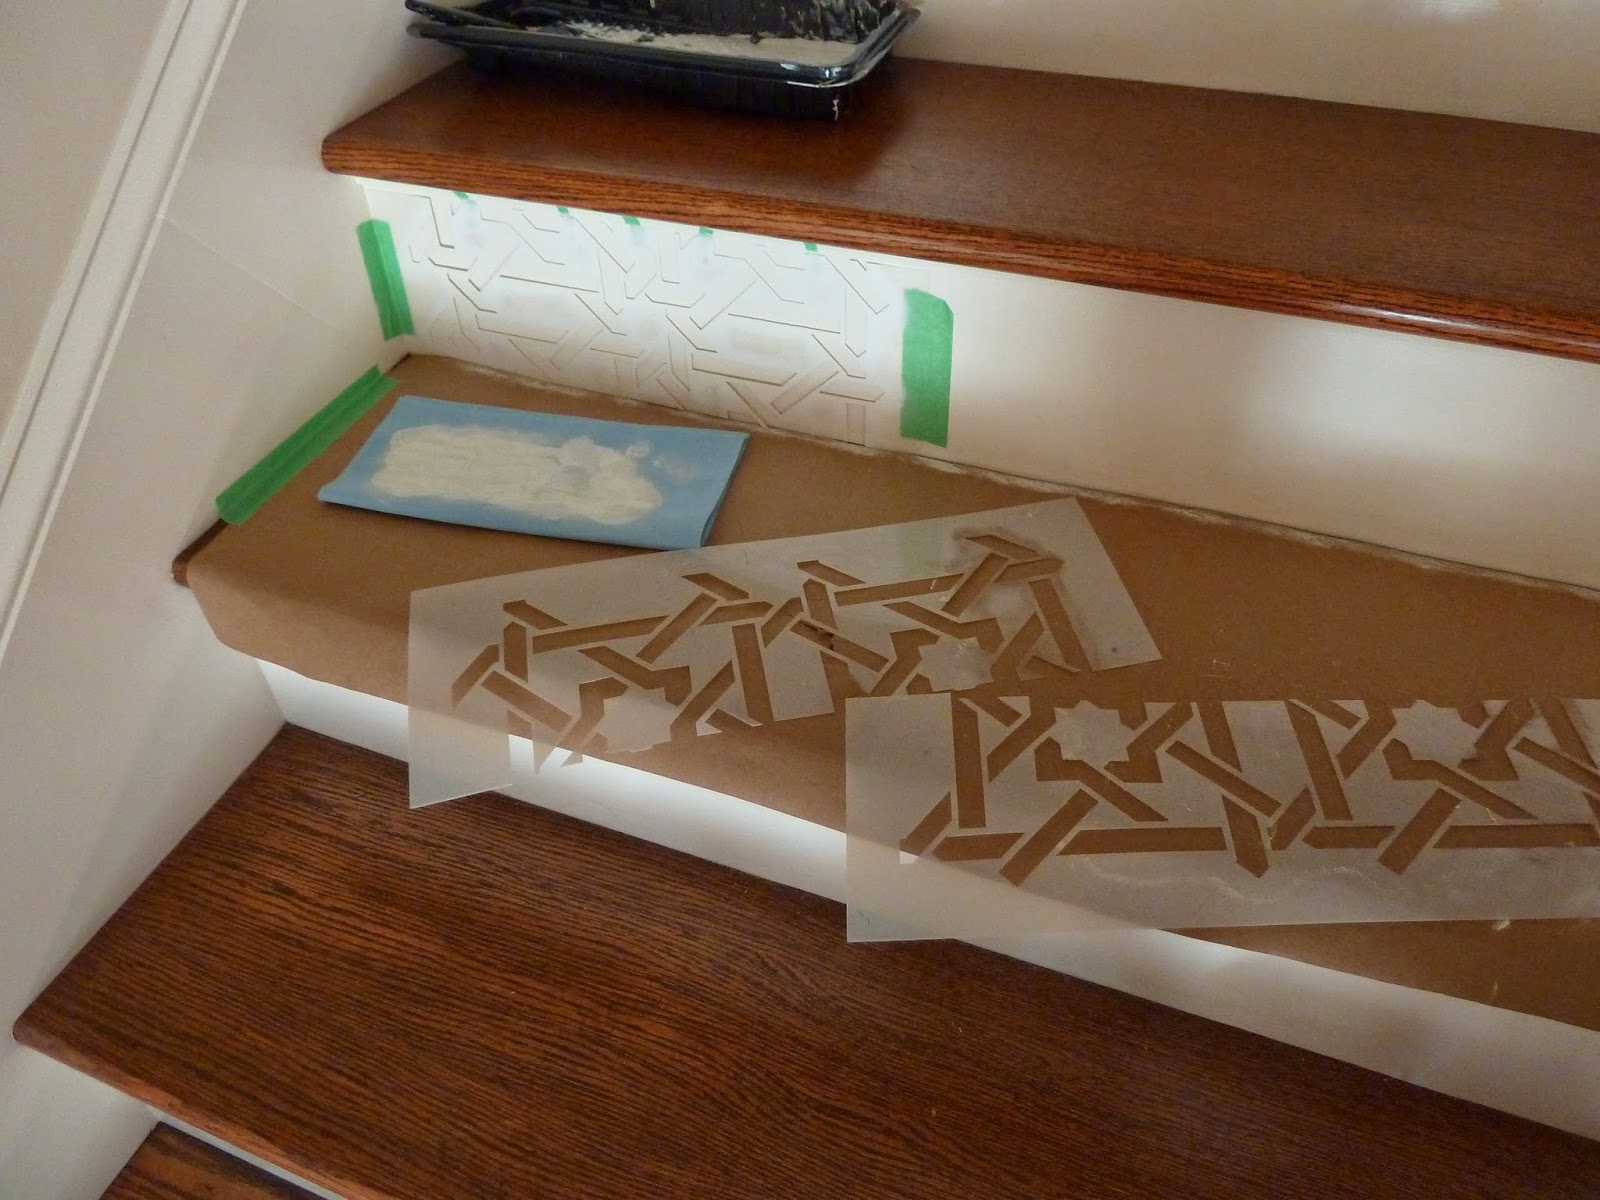
While I wasn't happy about having to do it again, I still felt very strongly about having this unique feature on the staircase.  But it was going to be tricky! With the risers completely connected to the stair treads, I had no choice but to paint them in place.  This meant also having to trim the stencils to the same size of the risers in order for them to lay flat.  I didn't want to do this but truly had no alternative.  Given this dilemma, I really didn't want to compromise all my stencils so I decided to re-stencil using only one design. 
Royal Design Studio's small camel weave, which is my favorite.


During one of the snowstorms, we lost power and I decided to get started.  It was the perfect time, and the glare from the snow outside provided the perfect lighting.


As before, the risers were painted with a satin finish, and I stenciled using the same color,
Sherwin Williams Westhighland White, but in a matte finish.


The final result is tastefully elegant and is stunning without being overwhelming.


Tuesday, September 3, 2013

The Stencil Project, Finished

So after several weeks of working on this project, it is finally complete, and we couldn't be more pleased!  Even TravelinBRITS is happy with how everything turned out!  But because the risers still aren't attached to the stairs, I don't have a photo of the "finished" project.  Hopefully by the end of September the staircase will be complete and everything will be in place.

before
 
A little background history: 
We’ve spent many years living in various places around the world due to my husband’s active duty military assignments.   Our most recent overseas assignment had us in Morocco for 3 years.  We fell in love with Moroccan patterns, design and colors, but most interestingly we started collecting antique hand-carved wooden doors with the intention of incorporating them into our home construction as functional doors, which is super exciting to see them being brought to life again as they are hung in the doorways around the house!  We also collected a wide variety of beautiful Moroccan lanterns that will be hung around our home as functional lighting, but also as accent pieces.
 
Stenciling the stair risers was an idea I had while following the beautiful blog of Maryam Montague, My Marrakesh, and seeing one of the finished projects at Peacock Pavilion in Marrakesh.  The amazing stencil designs and projects were developed by Melanie Royal of Royal Design Studio

My husband and I wanted the final result of our project to be subtle due to all the other patterns greeting guests ranging from the old doors, to the lanterns, to the iron balustrades. So I chose contrasting finishes (matte and semi-gloss) of the same color paint, Valspar Sunset Nude, to achieve the look, and am completely blown away with how much I love it!!!


Because of the heavy influence of Moroccan design throughout our home, I chose three Royal Design Studio stencils from their Moroccan collection (choosing WAS NOT easy!): 


What a great way to give our home a unique, hand-painted look!  I can definitely see more stencil projects in our future for making dramatic statements wherever we choose!

And while this isn't the final look, it makes me giddy with anticipation of what our staircase will really look like when it is complete!


Sunday, July 28, 2013

The Stencil Project

OK.  I've had a busy week, and finished the "trial" attempts using variations of color combinations a few days ago.  Travelin BRITS came home over the weekend.  I was able to explain to and show him my trail run for this project.  We were also able to place the board on the stairs at the house to get a feel of how it would look.  I was sent to another level of anticipation and excitement, he was a bit less enthusiastic, but was willing to give me the go ahead for the project!!!   WOO HOO!!!

Please keep in mind, this is not the design I plan to use.  I painstakingly chose 3 different patterns from the wide selection at Royal Design Studio, and placed my order TODAY!  I hope to finalize our color palette for the entire house sometime this week, so that when my order arrives from RDS, I'll be able to jump right in to giving our home a very unique look.  But I'm still thinking the risers will be painted the same color as whatever color the trim work will be (most likely a creamy off-white color) and for the stencil design, I'll go with a very subtle shade darker than the riser.

I was able to pick up a long piece of plywood that would allow me to try several different variations of background and pattern colors.

I measured it out and then sectioned off 1-foot areas for each of the variations of color and pattern.

Paint, brush, tape, pencil, and one photo-bombing dog wanting to play......

Still not definitive on our paint colors for the house, but here are 3 varying Valspar paint colors.  From left to right:  Courtyard Tan, Mediterranean Caramel, and Cafe Miel...

....all shown here on the plywood board.

Here I've got everything laid out and ready to go... stencil in place, paper towels, paper plate, brush and paint.

The neat thing about stenciling is you don't have to use a lot of paint to get the look you're going for.  Just a small amount applied to your brush, which is then rubbed off onto a paper towel.  Then, in circular strokes, you're going over the surface of the stencil, careful not to apply too much pressure for fear of resulting in bleeding under the stencil...

This is the result of the first section I worked on, with the background done in Valspar Courtyard Tan.  Unfortunately, the design on the left is not quite what I envisioned due to my not completely cleaning the brown paint from the brush.  However, I sorta like the light creamy color that resulted using Americana Light Buttermilk and a not-completely-clean brush! :)  The design on the right was done with a darker paint, Americana Toffee.


An action photo, showing the daubing on the paper towel, the paper plate palette, and the result using much darker paint, Americana Cocoa and Honey Brown on Valspar Courtyard Tan.


This section is shown with the Valspar Mediterranean Caramel background and the Cocoa and Honey Brown stencil paints.  As you can see, or maybe can't see, the Cocoa is virtually the same color as the Mediterranean Caramel.  I want to go subtle, but this is a little too subtle considering all the work this project entails! 

Lastly, the background using Valspar Cafe Miel and Americana Honey Brown on the left and Stencil Magic Paint Creme in Warm Brown on the right.

I still think my favorite result is the Valspar Courtyard Tan with the stencil design done in Light Buttermilk.

Keep in mind, I'm still perfecting the technique and hope that when I start the project for the stair risers, I'll be a lot more confident with my technique, knowing just how little paint it takes to achieve the look I'm going for.

All Valspar paints from Lowe's.  All Americana paints from Hobby Lobby.

So...what do you think?